


How to Lace On Cloud Shoes: 5 Best Ways

Lacing your On Cloud shoes correctly can greatly improve comfort, support, and style. But what if you could get the right fit without worrying about water damage or discomfort?
This is where Vessi shoes come in. Unlike On Cloud shoes, Vessi provides 100% waterproof, lightweight, and ultra-comfortable sneakers, boots, and slip-ons for all weather. Their airy, flexible knit material provides the ideal blend of comfort and protection, rain or shine.
Now, let's look at five different ways to lace On Cloud sneakers for maximum comfort and performance.
Methods of Lacing On Cloud Shoes
1. Diagonal Lacing
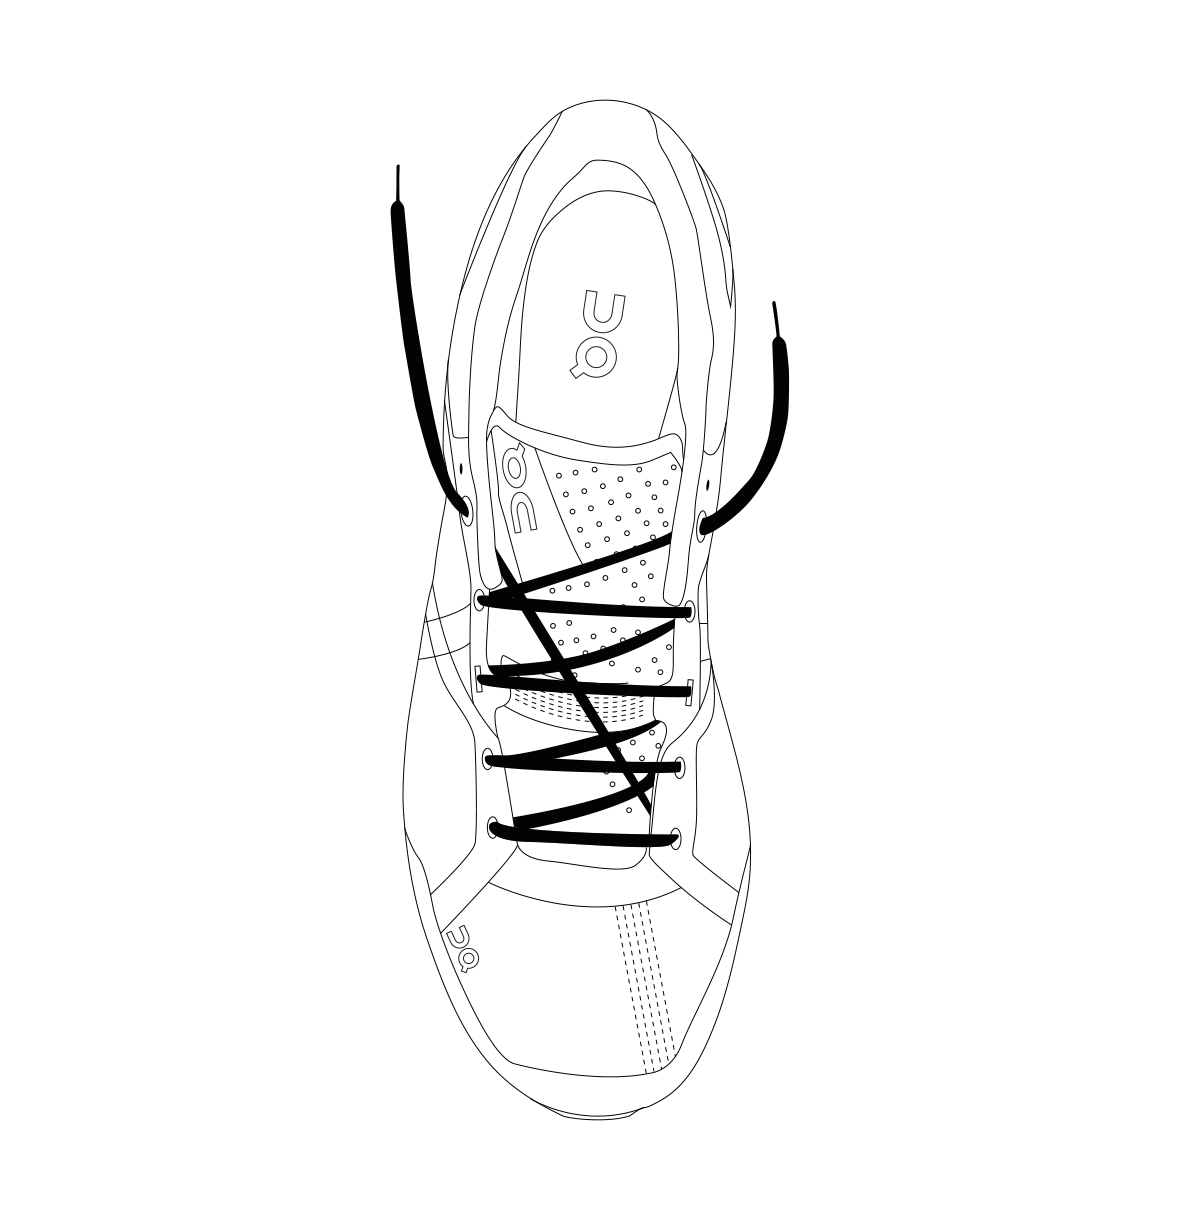
Image Source: coorte.top
The recommended method of lacing for On Cloud shoes is diagonal lacing particularly if the shoes cause blistering or if you have big toes. Often called the double helix method, this lacing technique provides extra space for the toes to move. It is most appropriate in shoes that require many eyelet holes. Follow these steps:
-
Take the diagonal route with the shoe laces.
-
Take one end of the shoelace through the top eyelet, run it diagonally down to the shoes' bottom eyelet, and insert it into it.
-
Thread the shoelace into the bottom hole of the opposite side, ensuring this end has a suitable length to tie your shoes.
-
Cross the lace diagonally to the following open eyelet and thread it directly over to the opposite side.
-
Grab the lace from the inner side and insert it into the opposite side's next eyelet.
-
Continue lacing diagonally through the next open holes and straight across to the opposite eyelet using this shoelace end until you reach the last eyelet.
-
In the end, fasten the laces.
2. Cross-Over Lacing
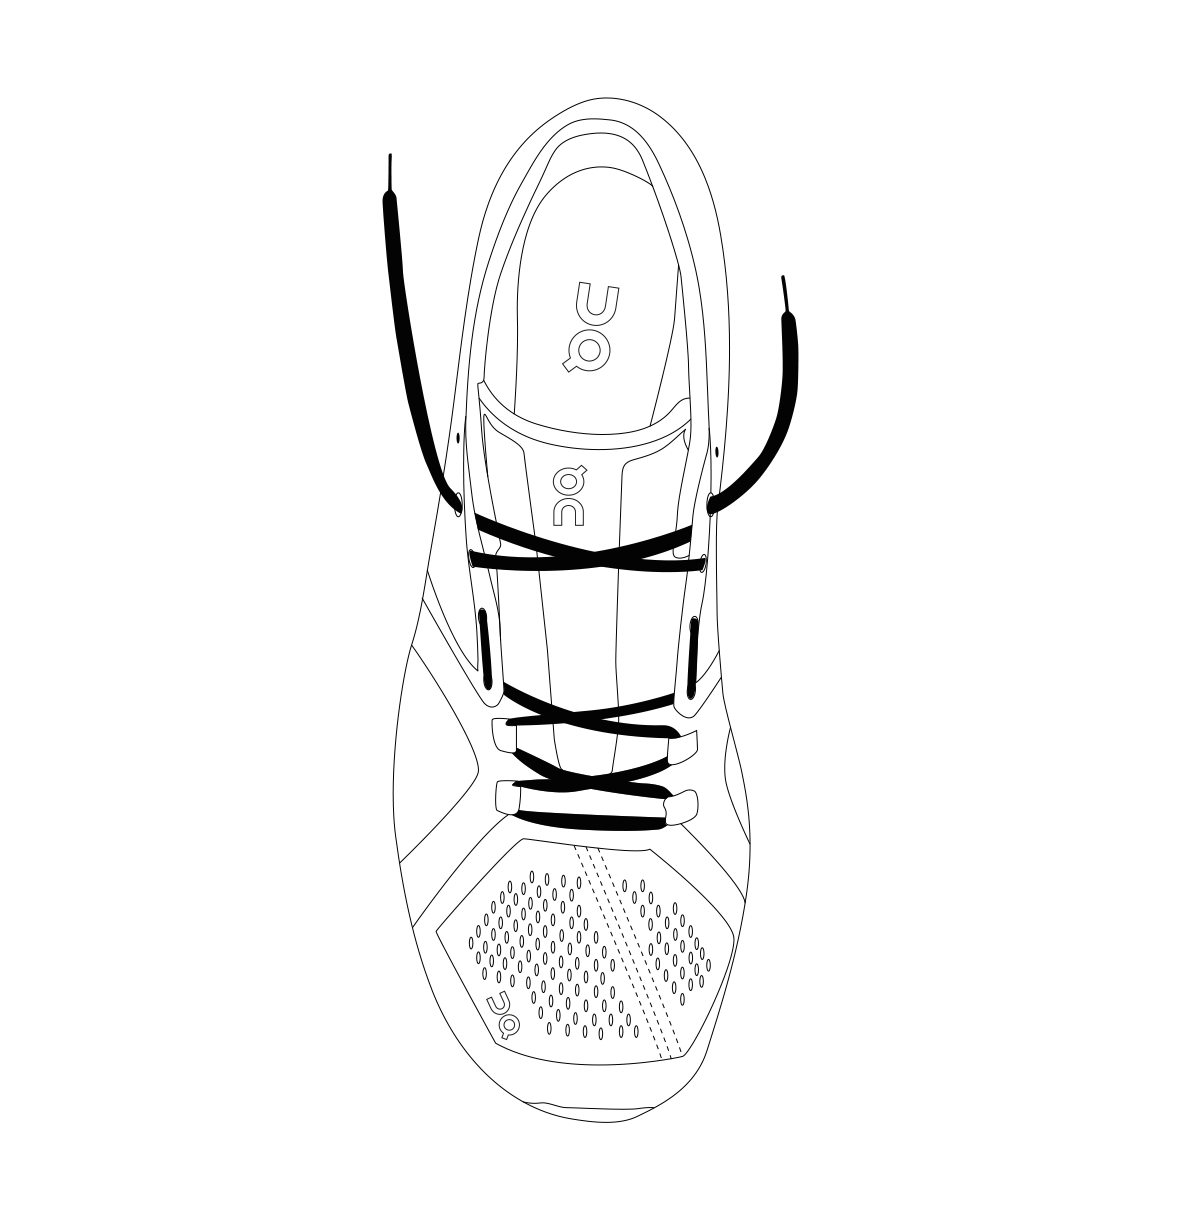
Image Source: brilliantinimoda.it
The cross-over lacing technique is similar to cross-lacing, but it is slightly different and best suited for the high instep. This shoe lacing method is useful for Vessi Everyday Move Sneakers and individuals who want space in the middle of the shoe for activities such as walking and exercising at the gym or even hiking.
Therefore, it is recommended to wear a shoe with an open central area so that your feet can expand if the need arises. Follow these steps:
-
Use the crisscross method to lace the bottom two or three eyelets.
-
Thread the right lace’s end on the same side while leaving the mid-space of two or three eyelets in the middle.
-
Repeat the above step on the left side
-
Continue lacing the remaining top eyelets using the crisscross method.
-
Tie the laces as usual.
3. Skip Lacing
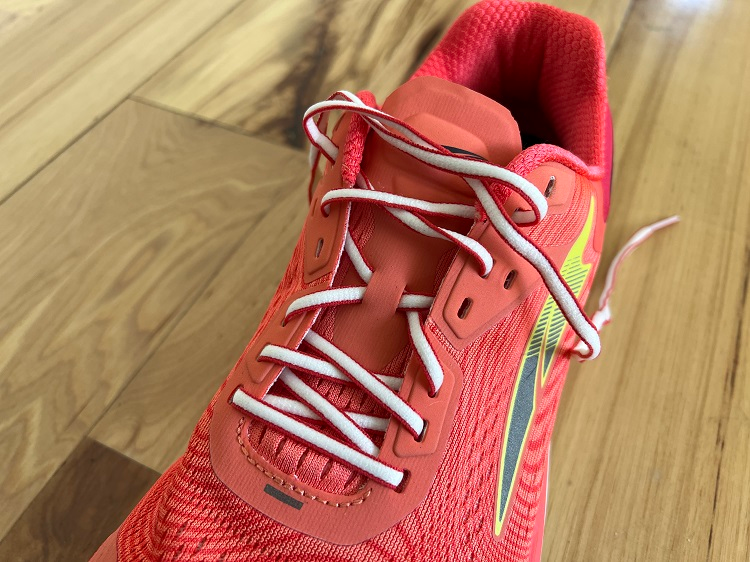
Image Source: runtothefinish.com
If you have a high mid-foot, the skip lacing technique is the best way to lace these lightweight running shoes. It is also a preferred method for eliminating discomfort, pain, and injuries resulting from applying pressure on the feet to the shoe. For this method:
-
Thread shoelaces at the top eyelets of the shoes and check both ends to ensure their lengths are the same.
-
Lace all eyelets, but skip one hole on each side. You can follow the cross-over approach and leave eyelets wherever you want to create extra space.
-
Tie the lace ends appropriately.
4. Loop Lacing
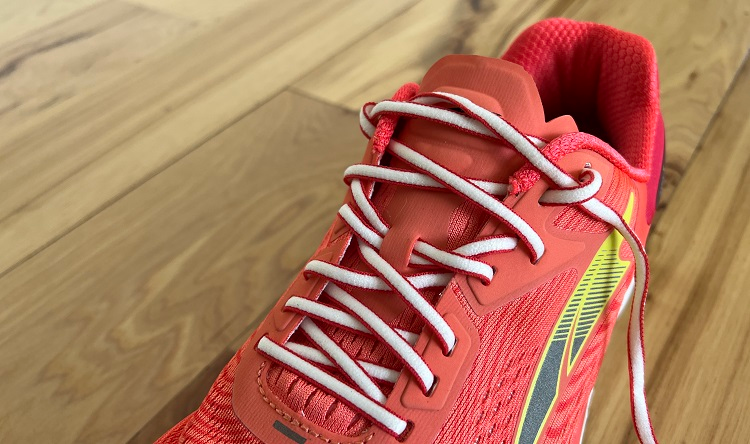
Image Source: runtothefinish.com
Another great technique to use on the On Cloud Running shoes is the loop lacing or the heel lock lacing. It maintains a good fit to achieve a stable running position by minimizing foot movement or slippage. The heel lock lacing technique technique also provides ample space as the foot grows over time. Therefore, it is suitable for expanding kids shoes. Here are the steps:
-
Slip the shoelaces in the bottom eyelets from above and ensure both ends have equal length.
-
Lace the remaining eyelets using the normal crisscross method until you reach the next to last eyelets.
-
To create a loop on either side, hold the end of one side's lace and insert it into the last eyelet of the same side. Do this with the lace on the other side, too.
-
Thread the end of one lace into the opposite side's loop and repeat the previous step with the other shoelace end.
-
Insert the shoelaces in the loop a few times to secure both sides.
-
Finally, you can tie shoelaces as you usually do.
5. Crisscross Lacing
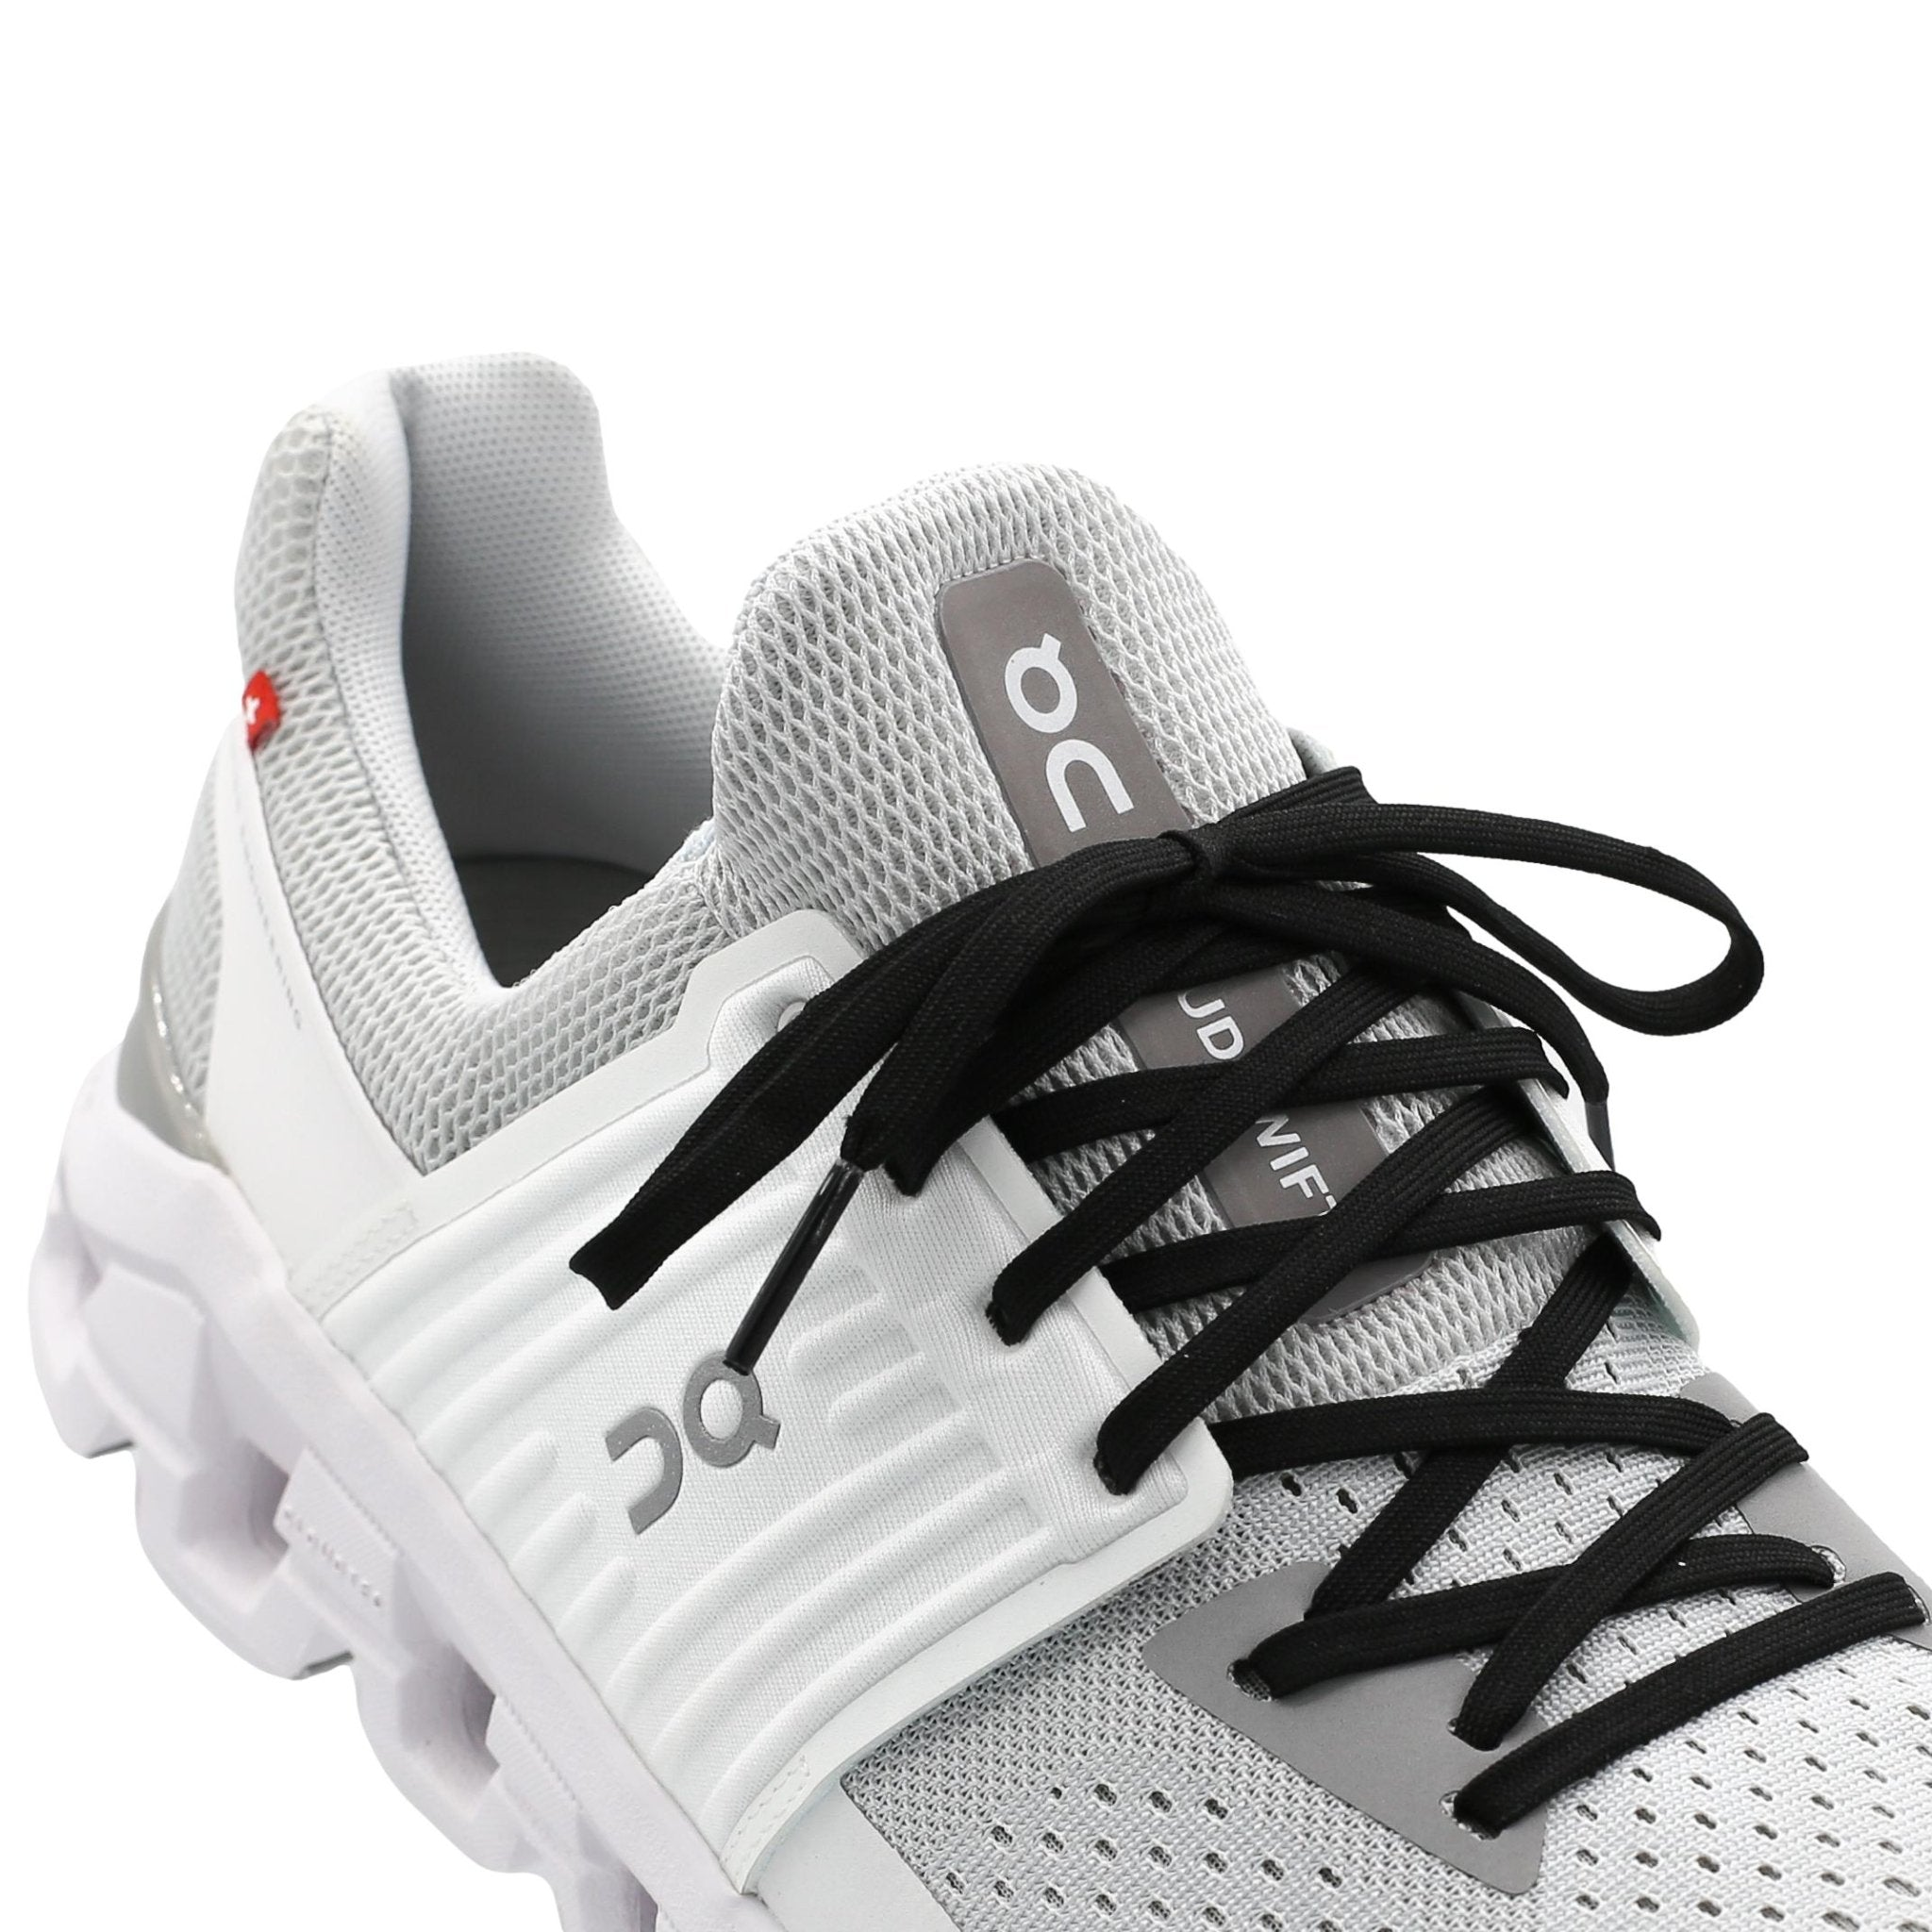
Image Source: shoelacesupply.com
Cross lacing is used when lacing up all types of footwear and therefore recommended as well to lace up the On Cloud shoes since it gives a better hold. This technique is useful if you are in need of close-to-foot wearing for a training or for a workout program. For this method:
-
Thread the shoelace through the bottom eyelets from the inside and check the lengths of both ends to ensure they are equal.
-
Insert the right lace end into the second eyelet on the left side from upward.
-
Thread the left end into the next right eyelet through the top.
-
Continue lacing up all the remaining eyelets in the same manner until you reach the last ones.
-
Tie your laces and make a bow as you usually do.
How to Lace On Cloud Shoes without Shoelaces Showing
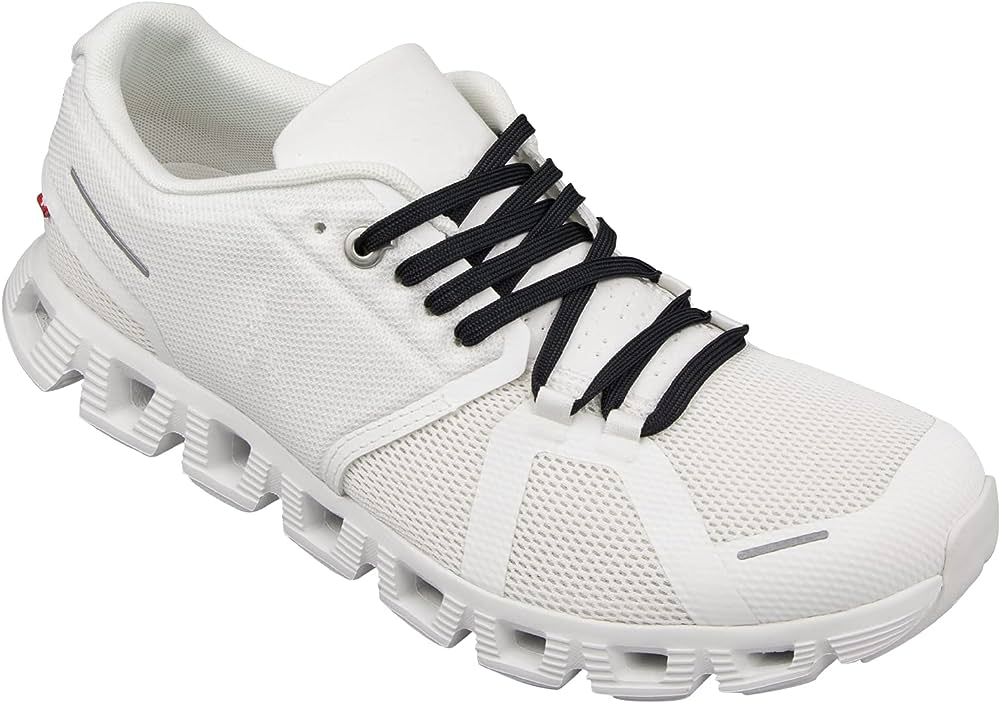
Image Source: amazon.com
1. Under Tongue
Under tongue is the most common and easiest way of ensuring that your shoelace does not show on your On Cloud shoes. Here's how:
-
Open up the lace: Loosen the laces carefully to safely initiate the process of retying so as to achieve your most preferred manner.
-
Insert the lace: After that, it is necessary to re-put the lace, but this will not happen through the conventional method. However, it should be worn with the shoelace inserted through eyelets starting from outside moving to the top eyelet. Do not forget to tighten the lace to your required firmness before putting on the shoes.
-
Tugging the lace: After successfully installing the lace, there is one final step, which is to tie them up. Make sure they are firmly secured and do not come loose. Then place the knot behind the shoe tongue and pull it through firmly. Pull it well so that the lace does not show and you get the desired neckline.
2. Hiding Under the Insole
Another tender method of concealing them to prevent your laces from being seen is by tucking them under the shoe insoles. However, this method depends with the ability of your insoles to detach and come up.
-
Lace-up the shoelace: Tie your shoelaces in the manner of your preference with the help of the shoelaces present on the shoes. Check each shoelace to ensure it goes through the hole at the top of the eyelets.
-
Hiding the lace: Once it gets to the top eyelet, lift the insole and pull both ends of the laces underneath the insole. Put back the insole whenever they are secured and you are ready to go!
How to Lace up and Tighten On Cloud Speed Laces
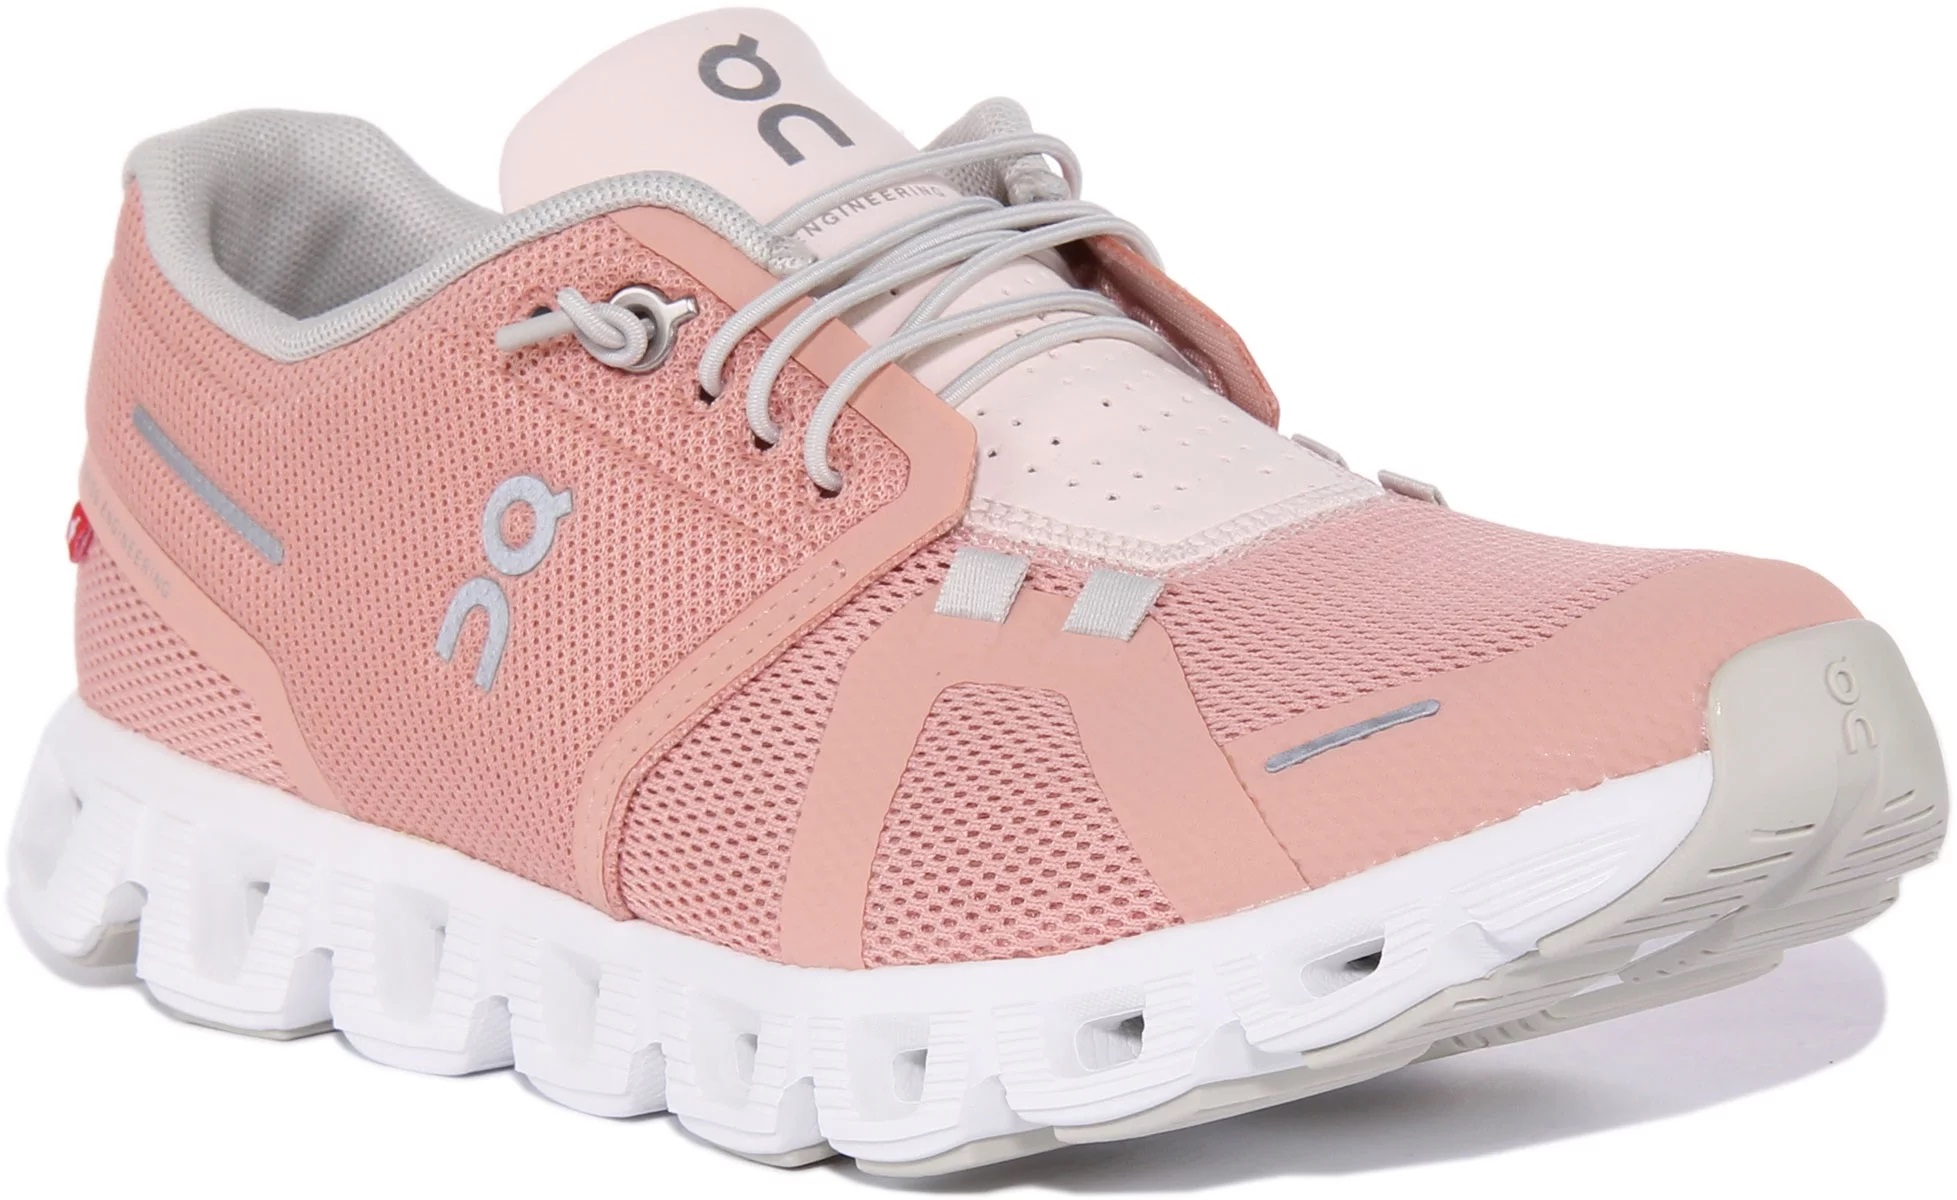
Image Source: walmart.com
Speed laces act as a substitute of the shoelace that is found in your footwear. They enclose your foot making it easy for you to adjust them to the level of tightness you desire each time without it being a lace that becomes tightened and knotted when putting on your shoe. Speed laces are compatible with all On Cloud shoes, so you can easily buy them online.
Here's how to lace up and tighten the speed laces on On Cloud shoes:
-
Thread the shoelace as you are used to through the eyelets from the bottom to the second last eyelet.
-
You can add the speed lace from one side and thread using one speed lace end straight across to the opposite eyelet.
-
Thread directly over to the opposite side.
-
Continue lacing until you reach the second last eyelet.
-
Fasten each lace ends in a knot.
To tighten the speed laces on On Cloud shoes;
-
Pull the knot a bit and take it beneath the lace. Ensure to pull the knot till it's tight enough.
-
Loop it back underneath and secure it.
-
Then, adjust the laces to distribute the fit evenly.
Tips to Lace-up On Cloud Shoes Properly
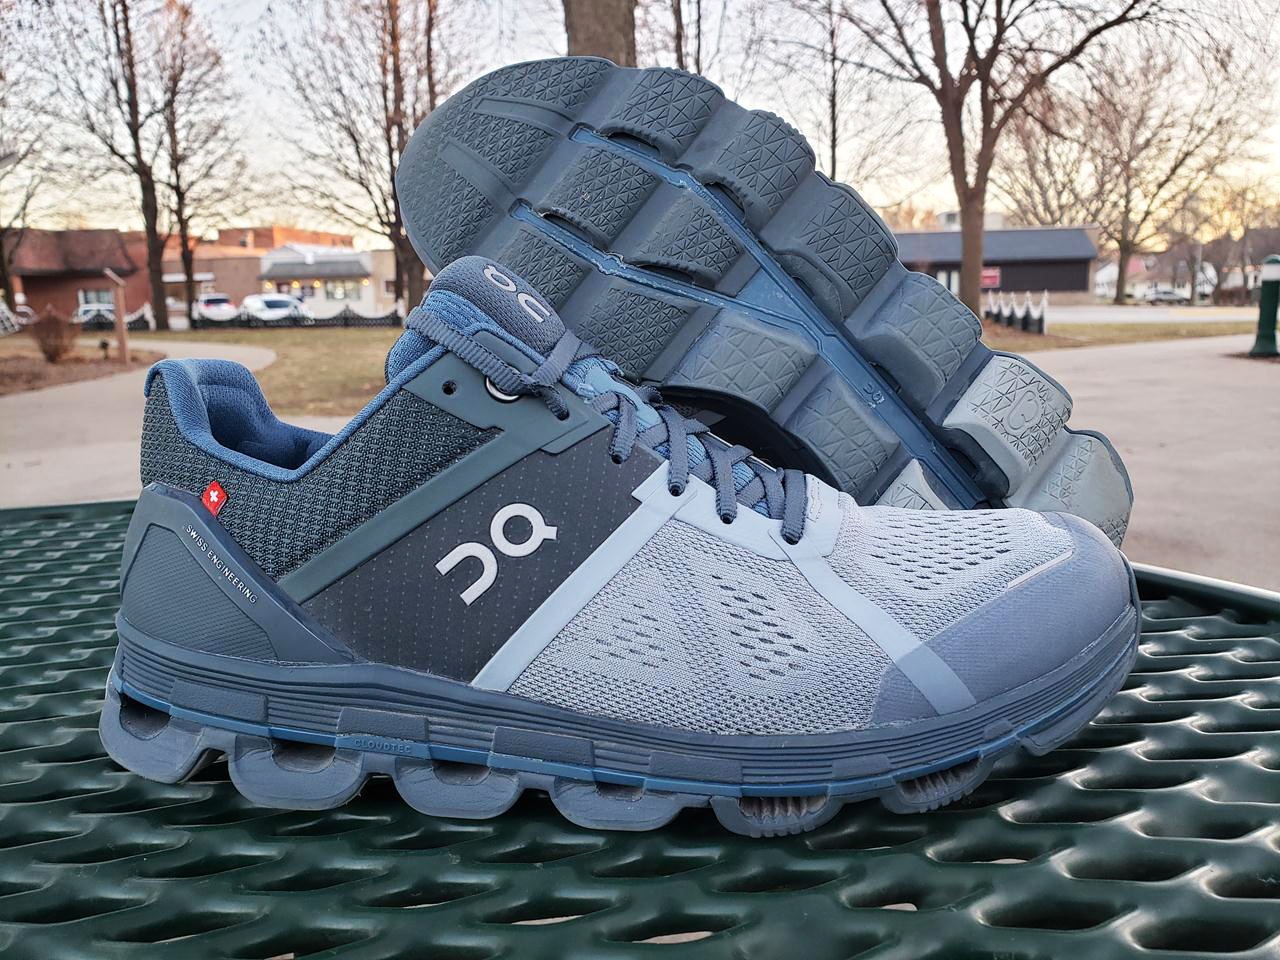
Image Source: runningshoeguru.com
To make your On Cloud shoes more comfortable, follow these tips for lacing them:
-
Choose a lacing style suitable for your foot type. For instance, use the loop lacing technique if your heel slips out of the shoes.
-
Purchase the correct size shoe to fit perfectly on your feet. No lacing technique will provide a comfortable fit in bigger or smaller shoes.
-
To hide the laces, make a bow inside your shoes as you usually do when you tie your shoelaces and bring it under the tongue. You can also tie a loop at the end of the shoelace and hide under the top eyelet.
-
Use the top eyelets to crisscross the shoelaces.
-
Adjust shoelaces to ensure your heels stay in place and your shoes fit on your feet.
-
Don't tie your footwear too tight to protect your feet from blisters, swelling, and unwanted pain.
-
Last but not least, always keep your On Cloud shoelaces clean.
Final Take
Using the proper lacing technique for your On Cloud shoes will improve comfort, support, and performance. Whether you want a firm fit for running, a relaxed design for everyday wear, or a no-tie alternative for quick slip-ons, these five techniques will help you get the most out of your shoes.
However, if you want an all-in-one solution that combines comfort, style, and 100% waterproof protection, Vessi has got you covered. Explore Vessi shoes for men and women, and discover footwear that adapts to your lifestyle, whether you're strolling in the rain, traveling, or looking for the ideal everyday shoe.


